This is another one I found on Annie's Eats while playing around on her blog last week. I have really been trying to like tomatoes lately. I knew I would be successful if I paired them with asparagus and feta cheese! Not only is this side dish fresh and flavorful, but its so pretty to look at. I love the way the colors really pop on your plate. Giada from the Food Network says you always eat with your eyes first, and I couldn't agree more. I think that the plating of your food is almost as important as how it tastes. That's why I love going out to eat at pricey restaurants. They always plate your food like an art masterpiece! With this side dish, you can plate yours at home for a lot less than going out to a white tablecloth restaurant. Fix your asparagus however you'd like. Steam, grill, broil. However. Its all going to be delicious when topped with tomatoes and feta!

1 bunch asparagus
1 tablespoon olive oil
1 shallot, finely chopped (onion can be a substitute)
2-3 vine ripened tomatoes, seeded and diced
3 oz. crumbled feta cheese
salt and pepper
Preheat the oven to 450 degrees. Snap off the tough ends of the asparagus stems. Drizzle the asparagus with a little olive oil and season with salt and pepper. Lay in a single layer in a baking pan. Roast in the oven for approximately 10 minutes or until crisp-tender. Remove from oven and set aside.
Meanwhile, heat the olive oil in a medium skillet over medium-high heat. Saute the shallot or onion until tender, about 3-4 minutes. Add the diced tomatoes to the pan and cook 2-3 minutes, just to warm and wilt very slightly (I used halved grape tomatoes). Remove the mixture from the heat, stir in the feta, and season with salt and pepper to taste.
Place the warm asparagus on a serving platter (or individual plates) and top with the tomato-feta mixture. Serve immediately.
Enjoy!
(adapted from Annie's Eats)
I love Annie's Eats, and I found this recipe on her blog last week. I read that it took a while in the oven so I tried to prep for that. Well, last night nothing went right in the kitchen. I was trying to fix too many things at once and nothing was going right! I got halfway through this recipe and realized that I didn't have any chicken broth. How did I run out of that? I had to put the prep on hold and wait until Clay could bring some home for me. So the rice didn't even make it into the oven until 7:30 or later. While the rice was cooking I made the Maple-Butter Blondies. After I ground up half of the walnuts I accidentally dumped them out of the floor. That left me with a big mess and no walnuts for the blondies. You can imagine that with everything going wrong and 2 little girls wanting my attention, my patience was running low! Clay also bought us two steaks to put on the grill when he stopped for the chicken broth. The rice was almost done, so I asked Clay to light the grill. Guess what? No propane. Dang! We ended up searing the steaks and finishing them off in the oven. They weren't bad. Pretty good actually. And this rice was really good too. I am definitely going to make this one again. It takes a while, but most of it is inactive time. I may add some toasted slivered almonds next time. A little crunch would have been good!

2 tablespoons butter
3 cloves garlic, minced
1 cup long-grain white rice
2-1/2 cups chicken broth, divided
1/2 teaspoon salt
1/2 teaspoon pepper
Squeeze of lemon juice
Preheat the oven to 375 degrees. Have a small casserole dish ready.
In a saucepan or skillet, melt the butter over medium-high heat. Add the garlic and rice to the pan and cook until both are golden brown, about 3-5 minutes. Stir in 1 cup of the chicken broth, the salt and pepper and bring to a boil. Pour the mixture into the casserole dish, cover (either with a lid or aluminum foil) and bake for 25 minutes. Stir in the remaining 1-1/2 cups chicken broth and bake covered for another 45 minutes. About 15 minutes before it is finished baking, stir in a squeeze of fresh lemon juice. The lemon really brightens up the flavor!
A note from Annie's Eats: This recipe can be doubled without increasing the baking time.
*This recipe made plenty of rice for my family of 3. I saved the leftovers and may use it for my Stir-fry later this week instead of serving it over noodles.
Enjoy!
(adapted from Annie's Eats)
I would have to say that this is probably my Mom's signature salad! She makes this all the time and it always gets rave reviews. Secretly though, I think she makes it because she loves the leftovers! I love the sweet crunch. This is perfect as a side or add some chicken and make a wrap. I made the Sesame and Ginger Chicken last night with some quick fried rice and made it into a one-bowl dinner. Talk about good! It makes a lot though. I only used 2 bags of coleslaw mix and didn't use all of the dressing. My Mom uses 3 bags of coleslaw mix and all of the dressing. It can feed an army! This would be great on the Easter table too!

2-3 bags shredded cabbage (or coleslaw mix)
2 3-oz. bags slivered almonds
1/4 cup sunflower seeds
1/4 cup sesame seeds (keep these in the fridge)
1 package chicken flavored ramen noodles
Dressing:
1 teaspoon pepper
2 teaspoons Accent
2 tablespoons sugar
1 teaspoon salt
flavor packet from ramen noodles
6 tablespoon vinegar (I used apple cider)
1 cup vegetable oil
Mix dressing ingredients together ahead of time and refrigerate (makes a lot). Toss and bake almonds, sunflower seeds and sesame seeds together at 350 degrees for about 10 minutes ( I didn't do this and its still good...just better if they are toasted). In a large bowl layer 2 bags of cabbage, seeds and dry ramen noodles (crush the noodles). Right before serving toss with dressing. When it begins to wilt down you can add the 3rd bag of cabbage (if you used ALL of the dressing) to add volume and crunch.
Enjoy!
(adapted from The Madison County Cookbook)
Hummm....not really sure what to say about this one. Although it wasn't one of my favorites, it doesn't go on the "never-make-again" list. If I do make this again, I would change some things up. This was my first time cooking and eating polenta. It is a thicker, creamier version of grits. And, yes, it was thicker. And being a Southern Gal I am used to grits being a certain way. If I were to make this again, I would thin it out with some more chicken stock (I did add an addition 1/2 cup or so, but it was still too thick). Although Clay said, "Why don't you just make grits next time". Good point. I have made this chicken before, but I used the apple gouda flavored chicken sausage. That was better in my opinion. The original recipe called for 1 lb. of sausage to be split among 4 chicken breasts. I used about 1/2 lb. between 4 and I thought it was still too much. Less sausage and maybe add some cheese. If you have polenta pointers, feel free to share. Next time I'll stick to what I know!

4 boneless skinless chicken breasts
salt and pepper
1/2 lb. Italian sausage, casings removed
2 cups milk
2 cups water
1-1/2 teaspoons kosher salt
1 cup yellow corn meal
1/2 teaspoon black pepper
2 tablespoons butter
4-oz. cheddar cheese, shredded
Preheat the oven to 425 degrees. Pound each chicken breasts to around 1/8" thickness (not too thin because the chicken will tear). Season both sides with salt and pepper. Divide the sausage among the chicken breasts and roll up. Secure with toothpicks.
In an oven proof skillet, heat the olive oil over medium-high heat. Place the chicken in the pan seam side down and cook, turning, until browned all over (about 5 minutes per side or until golden). Transfer the skillet to the oven and bake until cooked through, about 25 minutes (I cooked mine an extra 5 minutes).
Meanwhile, in a medium saucepan over medium-high heat, bring milk, eater and salt to a gentle boil. Gradually whisk in polenta. Reduce heat to low, and cover. Cook 15-20 minutes, until creamy, lifting the lid and stirring every 3-4 minutes to prevent sticking (I added additional chicken broth to thin out while stirring. Maybe around 1/2 cup or so). Remove pot from heat, stir in pepper and butter. Gradually stir in cheese.
Enjoy!
(Chicken Stuffed Sausage adapted from Rachael Ray)
(Cheesy Polenta adapted from AllRecipes.com)
There are so many different ways to make this. I think, ideally, this was born as a way to use leftover mashed potatoes. So, how the dish turns out really depends on how you do mashed potatoes! I didn't have any mashed potatoes waiting around in my fridge, so I mashed some up tonight. Before I really got into cooking I always made boxed mashed potatoes. I don't know why I thought the "real" mashed potatoes would be so intimidating. They really couldn't be easier, and actually don't take much more time. Sometimes I go the healthier route and mash them with just a tad of butter and use chicken broth instead of milk. Tonight I went all out! I added cheese, sour cream, butter and milk. Make your potatoes however you like them. And I would almost recommend this dish be made with the leftover potatoes. If you are going to go through the trouble to make mashed potatoes, eat them as just that...mashed potatoes! Next time I make this, I will use leftovers. I would have been just as happy eating the mashed potatoes the way they were on the stove tonight :) So, as you can see, this one wasn't one of my favorites.
 5 cups leftover mashed potatoes
4 slices bacon, cooked and chopped (optional)
1/4 cup panko bread crumbs
1/4 cup Parmesan cheese
Preheat oven to 375 degrees. Spray casserole dish with cooking spray (use the size that will hold the amount of potatoes you have). Fill the dish with the potatoes. Top with bread crumbs, Parmesan cheese and bacon. Bake for 20 minutes or until golden (I put mine on broil for a few minutes to get it brown).
Great way to use leftovers!!
Enjoy!
(adapted from BettyCrocker.com)
These potatoes turned out so pretty! This is definitely one you could make when you have guests. I served it with seared chicken breasts, but it would be GREAT with a steak. If you don't groove on mushrooms, you could certainly leave them out. I happen to love them. I will enjoy one for lunch tomorrow! Right now Publix has their potatoes, broccoli and mushrooms on sale. Ella loved this. Go figure! Sometimes I have a hard time getting her to eat green beans. Put broccoli, cheese and mushrooms in a potato and she eats it up!
 2 baking potatoes (I used 3 smaller-sized russets)
1 cup broccoli florets (I steamed mine before mixing them)
1 cup sliced fresh mushrooms (I used an 8-oz. container)
1 clove garlic, minced
1 tablespoon butter
1 teaspoon olive oil
1/2 teaspoon Worchestershire Sauce
salt/pepper
2 tablespoons butter
3 tablespoons milk
1/4 cup sour cream
1/2 cup mozzarella or other white cheese, shredded
Parmesan cheese
Preheat oven to 450 degrees.
Pierce potatoes with a fork; arrange on paper towels in the microwave. Microwave on High 16 minutes, rotating and flipping in 4-minute intervals. Let stand 5 minutes.
While the potatoes cook, melt 1 tablespoon butter and 1 teaspoon olive oil together in a large skillet. Add the mushrooms and garlic and cook for approximately 8 minutes or until tender, stirring frequently. Add Worcestershire sauce, broccoli, salt and pepper. (If you don't steam your broccoli add it in the beginning with the mushrooms, so it has time to soften). Remove from heat.
Cut each potato in half lengthwise; scoop out pulp, leaving 1/4-inch-thick shell. Put pulp in a medium bowl and mix in the milk, 2 tablespoons butter, sour cream, cheese and salt/pepper. Mash with a fork or potato masher until blended. Add to the broccoli mixture and stuff into the potato shells. Sprinkle with Parmesan cheese.
Bake in a 450 degree oven for 10 minutes or until light golden on top.
Enjoy!
(adapted from Cooking Light)
Who doesn't love Twice Baked Potatoes. These are WAY better than those frozen ones. Publix has a 5 lb. bag of Idaho potatoes for $2.49 this week. I found a 10 lb. bag of Russet potatoes at Allegri's Farm Market today for $1.99. I've even done a recipe similar to this where I used red potatoes. So, use what you've got on hand. Change it up a bit if you need to. I wonder if you could freeze these? I've thought about it before, but never tried it. I usually just half the recipe.
 4 large baking potatoes, scrubbed
6-8 tablespoons butter (I used Smart Balance)
2 teaspoons salt
1/4 teaspoon black pepper
1/4 cup milk, or as needed
1/4 cup sour cream (I used light)
2 egg yolks, beaten
1 cup shredded sharp cheddar
4-6 slices bacon, cooked and crumbled
Preheat the oven to 400 degrees. Bake the potatoes on a rack for 1 hour or until soft. Allow them to cool slightly.
(Or you can cook in a microwave in four minute intervals, flipping over after each one, until soft. Be sure to prick the skins with a fork. Mine took approximatley 24 minutes in the microwave this evening.)
Cut the potatoes in half, scoop out the pulp, and place in a mixing bowl, setting the skins aside. Add the butter, salt, pepper and sour cream. Mash well, adding enough milk to make a fairly stiff mixture. Add the beaten egg yolks and stir well.
Spoon the mixture into the potato skins and top with the shredded cheese. (If I bake 4 potatoes- 8 shells- I usually fill 6 of them because I like them really full. If I bake 3 potatoes- 6 shells- I fill 4 of them).
Place on a cookie sheet and bake for 20-25 minutes or well browned. Top with the crumbled bacon when you take them out of the oven.
 We served the potatoes tonight with Grilled Chicken Breasts and green beans.
Enjoy!
(adapted from Junior League Celebration Cookbook)
Tonight I made the BBQ Chicken Tenders and instead of making the Corn Fritters I decided to make them into Corn Muffins. Its a little bit faster and I just wanted to change it up a bit and show you how the recipe is adaptable. They were just as good. If you haven't tried the chicken tenders yet, try them. They are so tender and delicious. Do not over cook them on the grill and they will be perfect.

1 cup corn kernels
1 package Jiffy Corn Mufin mix
1-1/2 teaspoons granulated sugar
1 cup shredded cheese
1/4 cup milk
1 egg
Preheat oven to 400 degrees. Lightly coat 12 muffin cups with cooking spray; set aside.
In mixing bowl, combine corn, muffin mix, sugar, cheese, milk and egg; spoon evenly into prepared muffin cups. Bake 14-16 minutes or until golden. (I filled 11 cups)
Enjoy!
(adapted from Better Homes & Gardens)
I love to make these baked beans. They are so quick and easy. They are perfect for weeknight meals, and delicious enough to serve to guests. They are great on the stove, or make a larger batch and put in the oven for real "baked" beans. When the Jimmy Dean sausage goes on sale, you can half it into 1/2 lb. portions and freeze. These beans would be great with the BBQ Chicken Tenders and Corn Fritters I made the other week. Tonight I pan fried some boneless pork chops and served them with these beans and the frozen Teton Ranch Potatoes that were B1G1 a few weeks ago at Publix. Make these beans for dinner one night. Your family will be asking for more!

1/2 roll Jimmy Dean Sausage (1/2 lb)
1 28-oz. can Bush's Baked Beans
1 tablespoon maple syrup
3 tablespoons BBQ sauce
2 tablespoons brown sugar
1/2 teaspoon yellow mustard
Brown the sausage in a skillet over medium heat. Crumble with the back of a spatula while its cooking. Drain on paper towels and set aside.
Meanwhile, heat the beans in a medium saucepan over medium heat. Add the maple syrup, BBQ Sauce, brown sugar and yellow mustard. Add the sausage and simmer over low heat until thickened; about 10 minutes.
Enjoy!
I have been holding on to this recipe for a long time. I don't know why I never made it sooner! This was sooooo good! I found the recipe in a Martha Stewart Everyday Food magazine several years ago and adapted it to make it more "pantry-friendly". I used Jiffy Corn Muffin mix and canned corn instead of a cornmeal/flour mixture and fresh corn. I will definitely be making this one again. BBQ sauce is a good thing to stock up on when you find a good sale. I got Sweet Baby Ray's B1G1 last week at Publix. Right now Target and Publix are running sales on Del Monte canned vegetables. With the $1/4 coupon, I got mine for $.25 a can at Target!

BBQ Chicken Tenders:
1 teaspoon vegetable oil
4 chicken breasts, pounded slightly, and cut into 3 strips each
salt and pepper
3/4 cup store bought BBQ sauce, divided
Heat grill to medium heat. Place chicken in a medium bowl and season with salt and pepper. Pour 1/4 cup BBQ sauce over chicken + the oil (keeps it from sticking to the grill) and toss to coat. Use the other 1/2 cup BBQ sauce for basting.
Grill chicken, turning and basting occassionally with reserved basting sauce, 8-10 minutes total. Remove chicken from grill; serve with additional BBQ sauce and Corn Fritters.
Corn Fritters:
1 cup corn kernels
1 box Jiffy Corn Muffin Mix
1 cup shredded cheese
1-1/2 teaspoons granulated sugar
1/4 cup milk
1 egg
Preheat oven to 200 degrees. Mix all ingredients together in a medium bowl. Line a rimmed baking sheet with paper towels. In a large nonstick skillet, heat 1 tablespoon oil over medium. Working in batches, drop batter into pan by heaping tablespoons (I used my large Pampered Chef scoop, which is more like 1/4 cup). Fry until golden brown, about 2-3 minutes per side, depending on the side of your fritters. Transfer to prepared baking sheet. Sprinkle with salt and place in oven. Repeat. Keep warm in oven up to 30 minutes.
Enjoy!
(adapted from Martha Stewart EVERYDAY FOOD)
My Mom makes this casserole quite a bit. She usually uses the frozen hashbrowns, but since the Simply Potatoes Hashbrowns were on sale this week, I was going to use those. Obviously somebody else thought that the Simply Potatoes would make a nice hashbrown casserole too, because there on the back of the bag is the recipe! This is a smaller version of my Mom's. Her recipe fills a 9 X 13 casserole, but this recipe is a smaller version perfect for a weeknight meal. I have made it before when I did Breakfast for dinner for my father-in-law. It was great with eggs. My Mom serves this Christmas Day evening with our beef tenderloin dinner. It is an all around crowd pleaser and very yummy, perfect for the upcoming Holidays. I will post a picture when I get this made. I am tentatively putting it on the Menu for Wednesday, since I won't get to Publix for the new sale until Thursday!
Hashbrowns:
1 package Simply Potatoes Shredded Hash Browns
1 can Cream of Chicken soup
2 cups shredded cheddar cheese
3/4 cup sour cream
1/4 cup chopped onion (I omit this, or saute first before mixing)
1/4 cup butter, melted
Topping:
1-1/2 cups corn flakes, coarsely crushed
1/4 cup butter, melted
Heat oven to 350 degrees. Spray an 11 X 7-inch rectangular dish or an 8-inch square dish with nonstick cooking spray. In a large bowl combine all hash brown ingredients; mix well. Spread into prepared baking dish.
In a small bowl stir together topping ingredients. Spread topping evenly over hash browns. Bake 45 minutes or until hash browns are tender.
**This casserole freezes well. You could double this and freeze one casserole to eat later. With the Hash Browns B1G1 this week, it would be economical to do so. Also, the only time I use Corn Flakes is for this casserole. I put the cereal in a large zippy bag so that it stays fresher longer stored in the box!
Enjoy!
(from Simply Potatoes)
I feel that I have redeemed myself in the kitchen tonight. The reason there was no recipe post last night is because BOTH recipes I attempted were a total BOMB! First, I tried Thai Peanut Chicken with no success. Although, now I know how to tweak it to possibly post it later on. So then I tried a sweet potato muffin cream cheese thingy, and that didn't turn out either! So, I went to bed at midnight totally discouraged. I am proud to say that tonight, dinner was successful. This dish is a lot easier to make than I had anticipated. I shortened the ingredient list just a bit to make it more simple. I also halved the recipe and baked it in a 1-1/2 quart casserole instead of a 3-quart casserole. It would be great as a side dish or fuss-free main course. I will definitely be making this again! Publix has cauliflower on sale this week, so add it to your shopping list and try this dish. You'll be glad you did!
P.S. I am normally not a fan of cauliflower. So, even if you don't normally groove on cauliflower, step outside the box and give this recipe a try. Half it like I did, and serve it alongside something.

For the Full Size recipe:
12 oz. multigrain elbow macaroni (I used Ronzoni Smart Taste Penne)
1 head cauliflower broken into small florets
1 cup breadcrumbs
1 tablespoon butter
1 tablespoon extra virgin olive oil
1 onion, finely chopped
1-1/2 cups grated extra sharp Cheddar (I used cheddar and muenster)
1-1/2 cups reduced fat sour cream
1/2 cup milk
Heat oven to 400 degrees. Cook the pasta according to package directions, adding the cauliflower during the last 3 minutes of cooking time; drain.
Return the pasta pot to medium heat and add the tablespoon of oil. Add the onion, salt and pepper, and cook, stirring occasionally, just until soft, 5-7 minutes. Mix in the pasta, cauliflower, cheese, sour cream, and milk.
Transfer to a shallow 3-quart baking dish. Melt tablespoon of butter in a small bowl and mix in breadcrumbs. Sprinkle breadcrumbs over the top and bake until golden brown, 12-15 minutes.
This one is a keeper in my book!
** Update: I did make this again and I didn't use the cheddar like I used the first time and it was lacking in flavor. The sharpness of the cheddar allows you to use less cheese (more figure-friendly), but not skimp on the flavor. So, use cheddar if you have it available. The first time around, I used a marbled white and regular cheddar. YUMMY!
(adapted from Real Simple)
This is a great way to jazz up that packaged flavored rice that is always on sale at Publix. Those packages are a great template for flavor. Throw in fresh veggies and you've changed the whole tune. I had the carrots and onion leftover from the Shepherd's Pie, so I decided to add some egg and make fried rice. The zucchini is always my favorite when we go to a Hibachi grill, so that was added for color as well.

1 package Knorr Rice Sides (I used chicken)
3/4 cup diced carrots
1/4 cup diced onion
1 tablespoon soy sauce
1 tablespoon stir fry sauce (Kikkoman)
3 eggs
2 small zucchini, in chunks
chicken broth (optional)
In a large skillet, saute onion and carrot in olive oil for 5 minutes. Add rice packet and 2 cups of water. This is where you can take the opportunity to add more flavor and use chicken broth instead of the water. Cook according to package directions.
Meanwhile, in a smaller skillet saute zucchini in extra virgin olive oil until tender-crisp. About 5 minutes. Put aside and wipe out skillet.
Scramble 3 eggs in same skillet in a touch of butter. Set aside.
When rice is done, add the soy sauce and stir fry sauce. Stir in egg and zucchini right before serving.
You can add chicken or pork with this, or enjoy as a vegetarian main dish. My leftovers are already in the fridge for lunch tomorrow!
Enjoy!
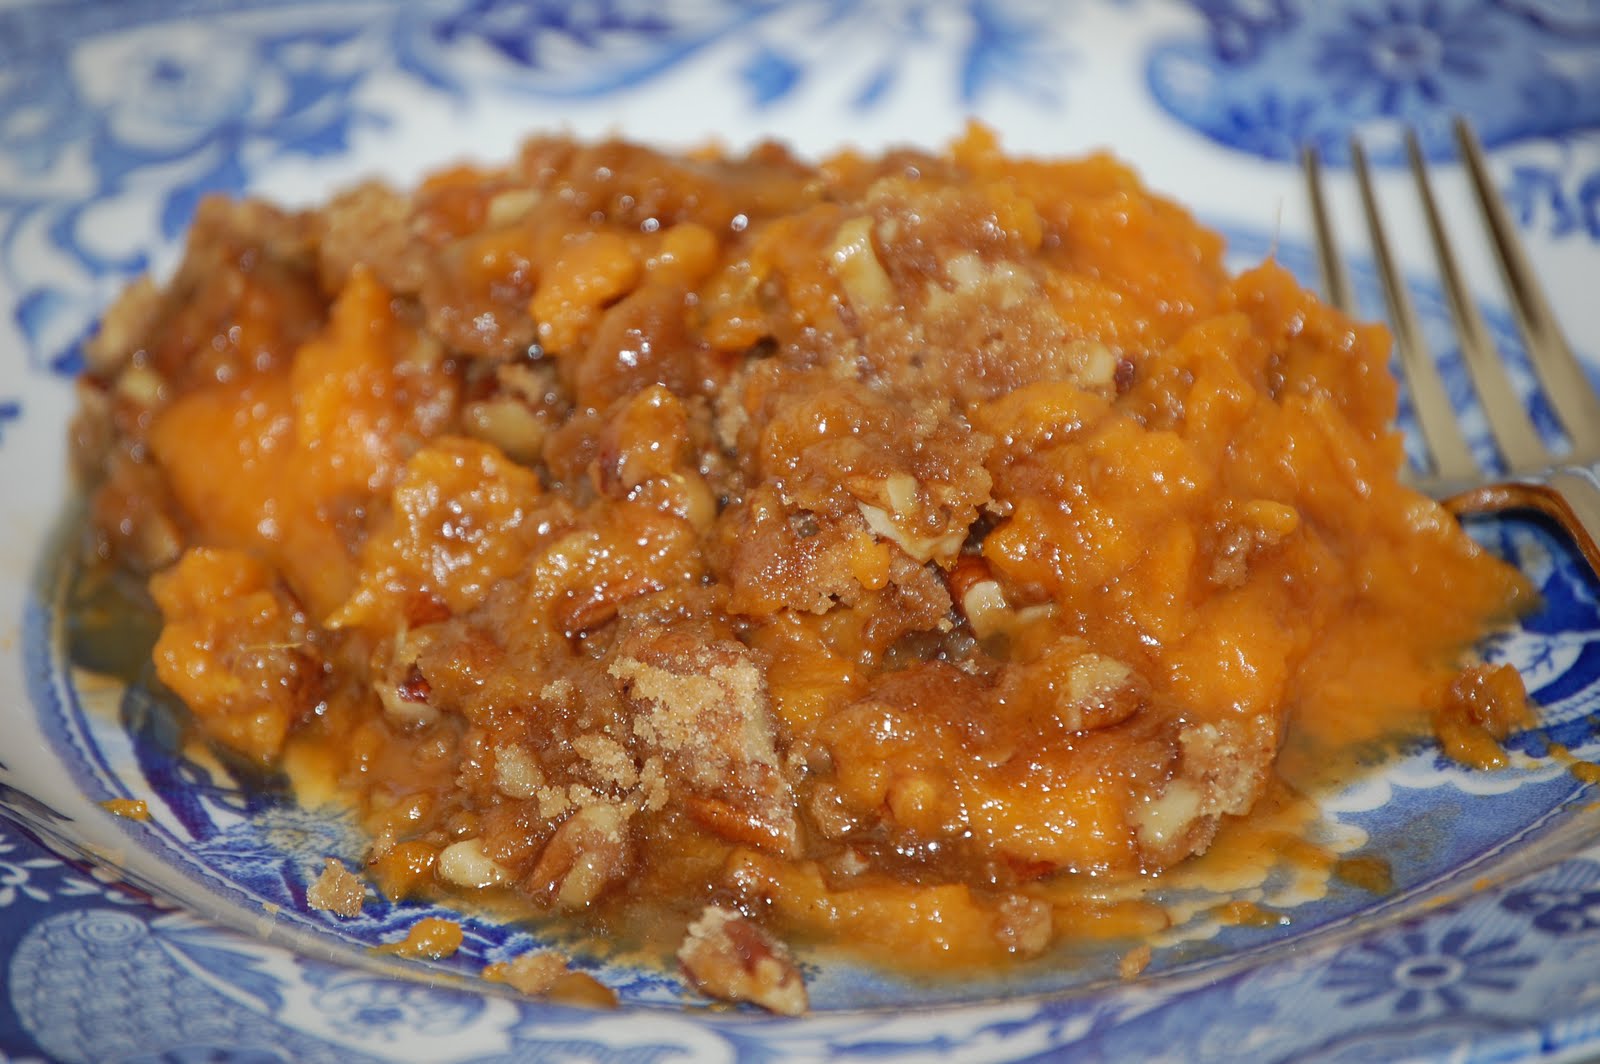
Who doesn't love Sweet Potato Casserole? Being such a Thanksgiving tradition, there are hundreds of ways to make it. This is the way my Mom does it. So, naturally, its my favorite! There are very few ingredients, so it is simple to make. Make it the night before, and just cover in the fridge. Uncover and bake right before dinner. For Thanksgiving any time of year, we've even made extra and put into smaller dishes and frozen them. When you get the craving, just thaw it and bake it. I think it would even be great with a scoop of vanilla ice cream! Casserole or Dessert...you decide.

Potato Mixture:
3 cups sweet potatoes, mashed
2 eggs
3/4 cup sugar (I used 1/2 cup)
1/2 stick butter
1 teaspoon vanilla
Topping Mixture:
1 cup brown sugar
1 cup chopped pecans
1/2 stick butter
4 tablespoons flour
Mix first five ingredients and spread into a butterd 9 X 9 casserole dish. Mix topping ingredients and crumble on top of potato mixture. Bake 25-30 minutes at 350 degrees.
**My Mom always doubles this (at least) so that we have leftovers. And, don't forget, you can always make more and put into two dishes. Use on Thanksgiving, and put one in the freezer!
Happy Thanksgiving!
(adapted from the Fairhope Fare Cookbook)
This is a recipe that is great for using the zucchini that has been on sale at Publix and Jiffy Corn Muffin mix that is always a good deal.
1/2 medium Zucchini, shredded (1 cup)1 8-1/2 oz. package corn muffin mix (Jiffy)1 cup shredded cheddar cheese (swiss is yummy too)1/4 cup milk1 eggPreheat oven to 400 degrees. Lightly coat 12 muffin cups with cooking spray(I usually fill 9).Combine all ingredients in a mixing bowl. Evenly spoon into muffin cups. Bake for 11 to 14 minutes or until golden.Enjoy!(adapted from Better Homes & Gardens)